Thursday, June 13, 2013

Nail Art: Neon Texture

Hi everyone, I don't have a new card to show you today, because I spend the entire night doing a new manicure. I bought the limited edition Texture nail polishes by China Glaze the other day. I had no idea what they meant by texture at first and I was really excited to play with the polishes. However, I don't think the "texture" turned out very well on all of my fingers. I will have to play with them some more and see if I can get a better effect next time. So here's what my manicure looks like.

So what I did with this manicure is I first painted my nails with the China Glaze Liquid Leather polish. Then I painted a coat of China Glaze Matte Magic to give the black polish a matte finish (which is also my latest obsession). Afterwards I free-hand painted each of the China Glaze Texture polish onto each nail. And that's it.
You can see the texture (bumpies) on my thumb and pinky nail, but the others ones are almost smooth looking. I'm also wondering if this texture effect can be achieved by 'stamping' a makeup sponge onto regular polish while it is still wet.

I love the neon colours especially against a black background. I think this manicure is perfect for the summer!

Here's a picture of all the polishes. There is supposed to be one more colour in the series, but I was too late and they were sold out of that colour by the time I got to the store. Maybe if I am really desperate I can buy it online, but I'm not, so it's all good. I now have 5 colours to go on my 5 fingers. = )
Names of the polishes from left to right: Unrefined; Of Coarse!; Itty, Bitty, Gritty; In the Rough; and Toe-TallyTextured. I think the missing colour is called Bump & Grind, which is a really dark pink colour (and I'm totally fine with missing that colour =P).

Thanks for visiting,
Cheryl ~

Wednesday, June 12, 2013

So Huggable

Who's huggable, you ask? Well, there are two things (actually one of them is a person) that are super huggable. First one is my hubby. He's huggable because he bought me the brand new Sizzix Big Shot machine!! He was going to save it for my birthday (that's coming up in a few days), but unfortunately I broke my Cuttlebug last night, so he had to give me this present in advance. He's really disappointed that he couldn't surprise me with it on my birthday, but it's okay, it's the thought that matters the most!

He had hidden the box somewhere in my house for the past two weeks and I had no idea. He made me search for it tonight and guess where I found it. It was hidden in the closet in my craftroom. I guess I don't go into that closet very often and even when I did I somehow missed this bix box on the top shelf. =P


The new colour of the Big Shot machine totally matches the wall colour in my craftroom! What a lovely coincidence! ^_^

Look how nice it sits in my craftroom. LOL!


The second thing that is huggable is the card I made. I think it is the cutest card I've made so far.

I was going through the Hero Arts Blog and found this tutorial for a Christmas card. I loved it so much that I made my own version of the card. 
The adorable little fox is from a digital stamp by Pixel Paper Prints. The owner of this Etsy shop is really talented and is also extremely friendly!! I highly recommend her store and products!

Isn't the little fox a darling?

This picture shows the inside of the card.

Thanks for visiting,
Cheryl ~

Tuesday, June 11, 2013

Tone On Tone Birthday Card

This is the second card I made with the other die. I love how this card turned out, but I am also really sad, because I broke my Cuttlebug machine while making this card. T~T This die doesn't cut very well so I had to sandwich extra sheets of paper in the die-cut-sandwich. But I guess I added too many sheets and while I was running it through the machine something snapped. And now it won't emboss or cut anymore. ='( My hubby said he will take a look at it tomorrow and if it's not fixable I'll have to buy a new one. Maybe this is the excuse to buy the new Big Shot machine.

Anyway... enough of my blabbing, here's my card.

I die cut the flowers and glued them onto a white background.

I love the tone on tone effect. I think it makes the card look so fancy. Hehe =P

Added a strip of patterned paper and vellum for the sentiment.

Thanks for visiting,
Cheryl ~

You Are Awesome My Friend

I found two die in my stash that I haven't had a chance to use yet. So I took them out and made two cards with them. This is the first card.

I wanted to use bright colours to make it look like fireworks. I picked a black card front to make the colours pop out more.


I coloured the background with Copic markers and then added Stickles glitter on top.

Thanks for visiting,
Cheryl ~


Monday, June 10, 2013

Thank You Cards

These cards are made for a couple of ladies who work at the Loius Vuitton in Calgary. They have been really amazing since the first time we met them many years ago. Their customer services are outstanding and they always treat us like super VIPs. And that’s not because we spend thousands of dollars at the store each visit =P. Now my family has become good friends with them and I just want to make them cards to say thanks for everything.

This is the first card I made. 
This card was designed by Shari Carroll. I loved it so much that I had to make one as well. You can watch Shari's video tutorial to learn how to make this card yourself.

The background was stamped, heat embossed and then watercoloured using Distress Ink Reinkers.


This is the second card I made. 
It was also designed by Shari Carroll. However, but I can't remember where she showed this card, therefore I cannot link to it. I think it could have been from one of the online card classes I joined.
What makes this card unique is that the white floral background is stamped on a piece of acetate sheet. In real life you can see the white flowers floating on top of the beige background paper.

Here you can see the layers I created with the patterned paper.
1 - white card base
2 - black card stock
3 - beige card stock
4 - strip of black patterned paper
5 - acetate sheet (with white stamped floral pattern)
6 - peachy/salmon strip (with "ABSOLUTELY" die cut) and butterflies
7 - yellow strip (with "FABULOUS" stamped and heat embossed)
8 - die cut chipboard heart covered in Distressed Stain in Picket Fence
9 - twine bow

The butterflies were punched out using Martha Stewart's Butterfly Craft Punch.

This picture shows the reflection of the light off the acetate sheet at the top of the card.

Thanks for visiting,
Cheryl ~

Sunday, June 9, 2013

Happy Birthday Jason!!

My dear friend's birthday is coming, 4 days before mine! ^_^ So I made him a card to wish him a happy birthday.


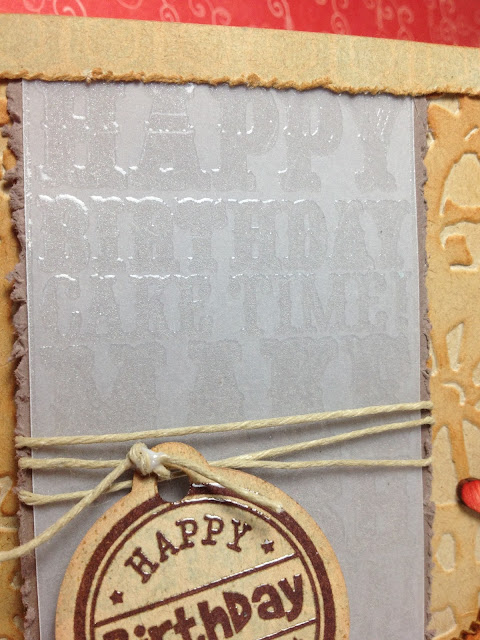
I stamped the birthday image on a piece of vellum and then heat embossed it with a clear embossing powder.  
Hehe, I just realized the glue on the knot hasn't completely dried yet when I took this picture.  I like to put a small dab of glue on knots and bows to make sure they don't come undone in the mail (or ever =P).

These are Studio Calico's wood veneer shapes that I stained with Distressed Inks in Tea Dye and Barn Door.

Thanks for visiting,
Cheryl ~

Friday, June 7, 2013

Get Well Wishes!

This is a "get well wishes" card I made for my sister to give to her sick friend. = ( Hopefully he gets better really soon!! 


I used the Under the Weather stamp set from Kraftin' Kimmie. The poor little guy looks so sick. = (

I couldn't find the right pattern paper so I made my own. The top strip was created by painting on watercolour paper with Distressed Paints in Weathered Woof, Chipped Sapphire, and Salty Ocean. The bottom strip was stamped with Mama Elephant's Modern Boarder set. I made my own embellishments by drawing dots with a marker and then covering them with Glossy Accents.

Thanks for visiting,
Cheryl ~

Thursday, June 6, 2013

Congratulations Catherine & June

My sister asked me to make a second wedding card for another pair of her friends. I went with a peachy/salmon colour this time.


I'm getting a lot of use out of this digi image (Kissy Kissy) from the Greeting Farm.

I wrote the sentiment by hand.


Left space at the bottom for my sister to write her personal message to the couple.

She also requested for a slot for her to put a cheque in.

Thanks for visiting,
Cheryl ~

Congratulations Belle & Steve

I made this card for my sister to give to her friends Belle and Steve who are getting married in a couple of weeks. Belle likes purple so I made this card her favorite colour.

I used my favorite couple image Kissy Kissy from the Greeting Farm.


I left room on the left of the card insert for my sister to write her message to the couple. On the inside of the card insert is a slot to put a cheque for the couple (see picture below). 


Thanks for visiting,
Cheryl ~

Grad Anya

I made this card for my friend, whose niece is graduating from high school.


This Grad Anya stamp from the Greeting Farm is just perfect for this card.

Thanks for visiting,
Cheryl ~


Hugs are the Best Medicine 2

Another friend is not feeling so good, = ( so I made this card for her to wish her well.

I used the Nurse Nightingale stamp again.

I used some patterned paper and baker's twine to decorate the top.

I coloured some pearls with the same Copic marker as I used on the nurse's dress.

Thanks for visiting,
Cheryl ~

Congratulations Christie & Ivan

I made this card for my cousin's wedding.


This is a stamp set called I Do from the Greeting Farm.

I made these flowers out of paper and added Stickles on the petals.


I made a slot on the inside of the card for the cheque.

Thanks for visiting,
Cheryl ~